Blinds Calibration Wizard#
This wizard helps installers properly calibrate blind timing settings. Incorrect parameters typically cause blinds to drift toward one extreme position over extended use, resulting in actual blind position differing from the application display.
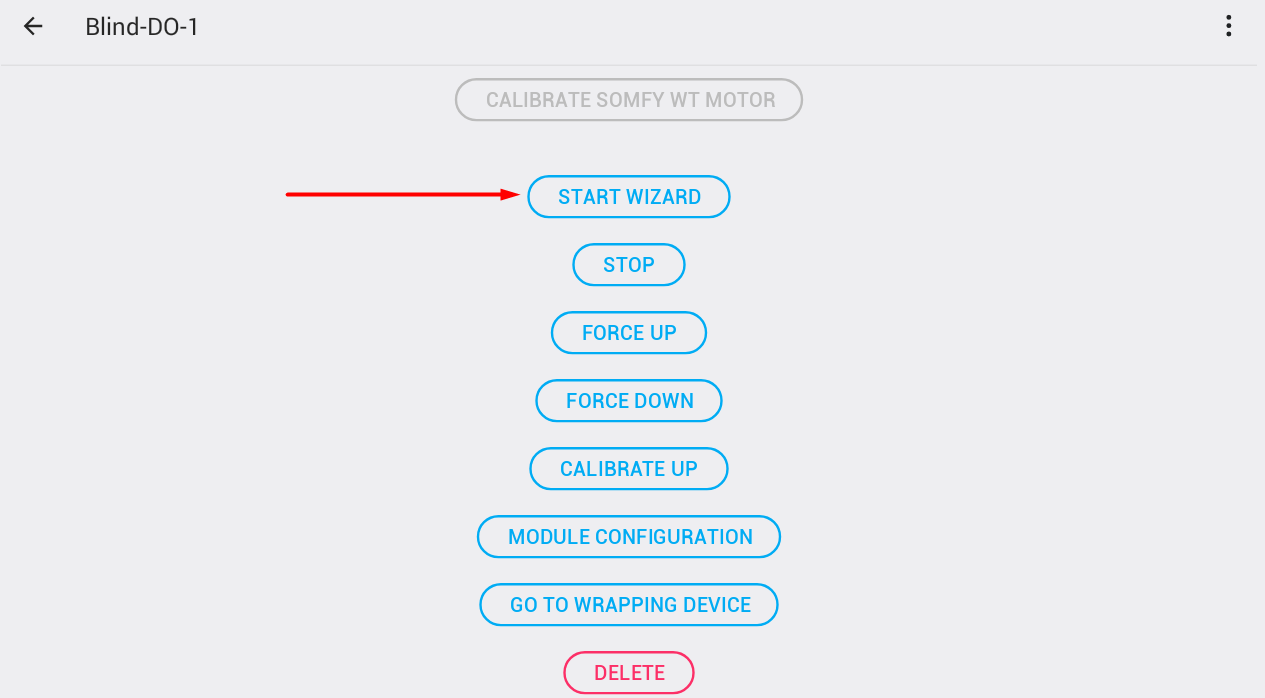
Starting the Wizard#
Navigate to blinds service settings and select the Start wizard button to begin calibration. The wizard will modify the blinds timer parameters during its operation.
Important Notice
Make sure you are connected to the installation locally (wifi / cable) and not via data (4G). You also need to run the wizard without active SR on the device.
Three-Step Calibration Process#

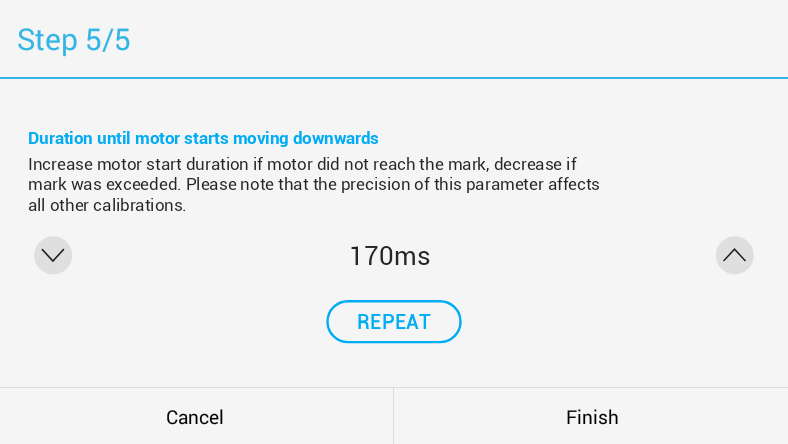
Step 1: Calibrate Motor Startup Duration#
Objective: Measure the time required for the motor to begin moving.

- Ensure blinds are fully raised
- Use the Move up button to adjust position
- Click Next when ready
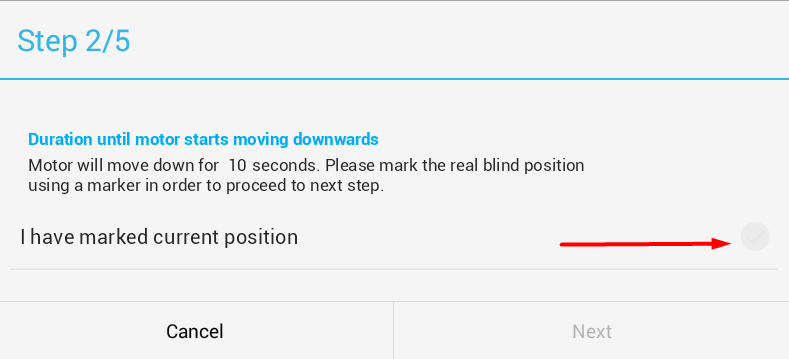
- Blinds will descend for 10 seconds - mark the final position with a sticker
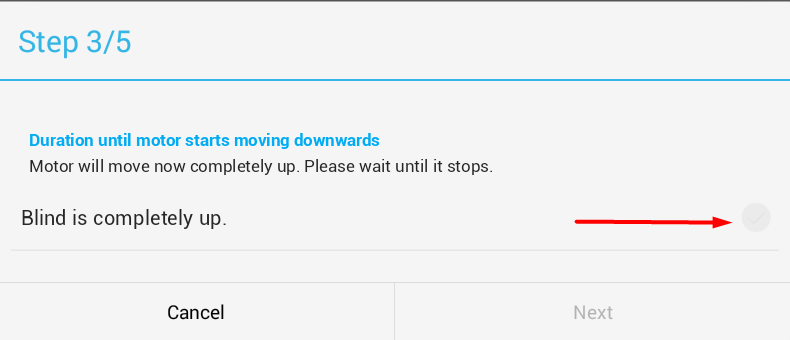
- Blinds return to top position
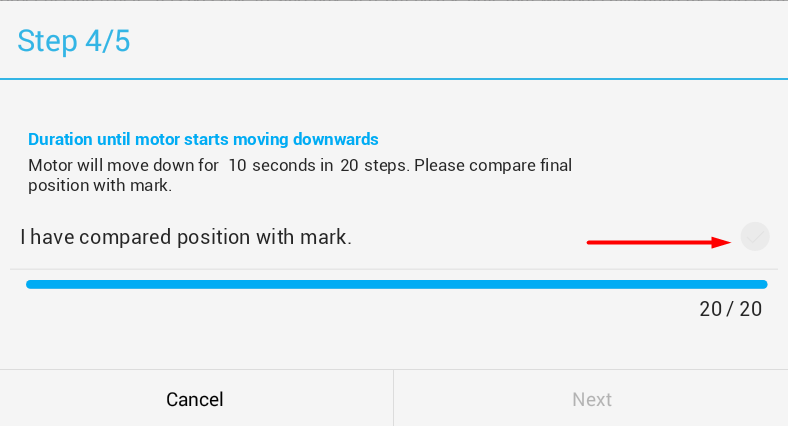
- System descends again in 20 small increments
- Compare actual position against marked location
- Adjust startup time:
- Increase the value if motor didn’t reach the mark
- Decrease the value if motor exceeded the mark
- Use small increments (5-10 ms)
- Repeat until position variance is under 5 mm
- Click Next to continue
Practical Tip
Precise calibration of motor startup time is crucial for proper functioning of all other parameters. Take sufficient time with this step.
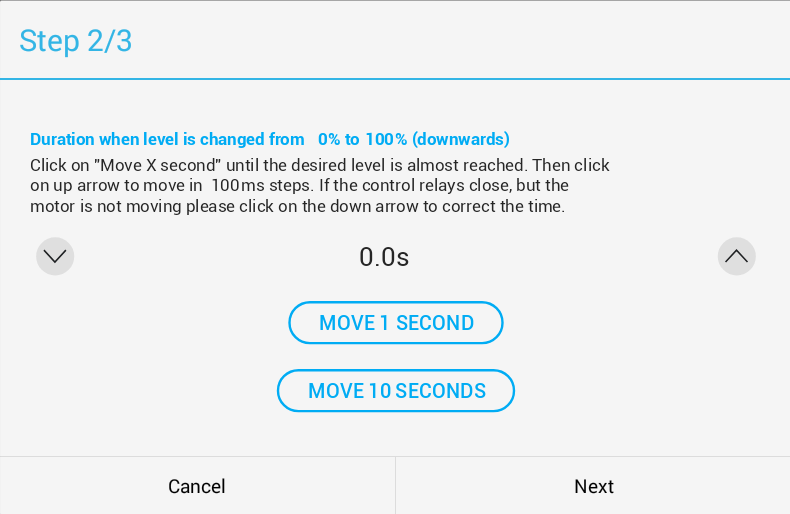
Step 2: Calibrate level duration time#
Objective: Measure complete top-to-bottom travel time and vice versa.
- Verify blinds are at top position
- Click “Move for 10 seconds” until blinds approach bottom position (but not fully down)
- Use “Move for 1 second” for fine tuning
- Fine-tune with 0.1-second increments to reach exact bottom position
- For mechanically stopped blinds, listen for relay click before stopping timer
- Click Next when blinds are at bottom position
- Repeat the procedure for upward movement
- Click Finish when blinds reach top with accurate timing
Note for Different Blind Types
Some blinds have mechanical end-stops, others use timing. Adapt calibration to your blind type. Upward travel typically requires slightly more time than downward movement.
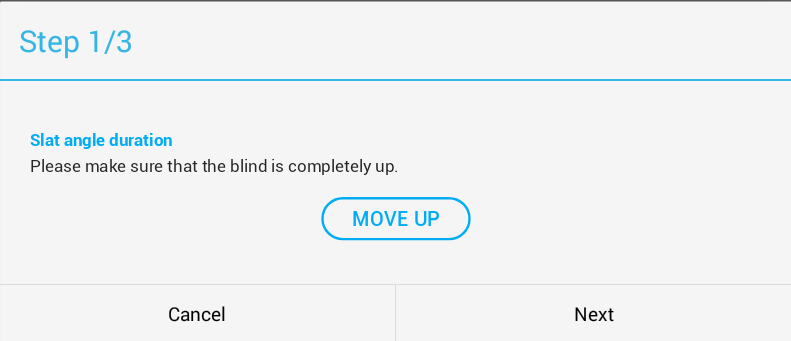
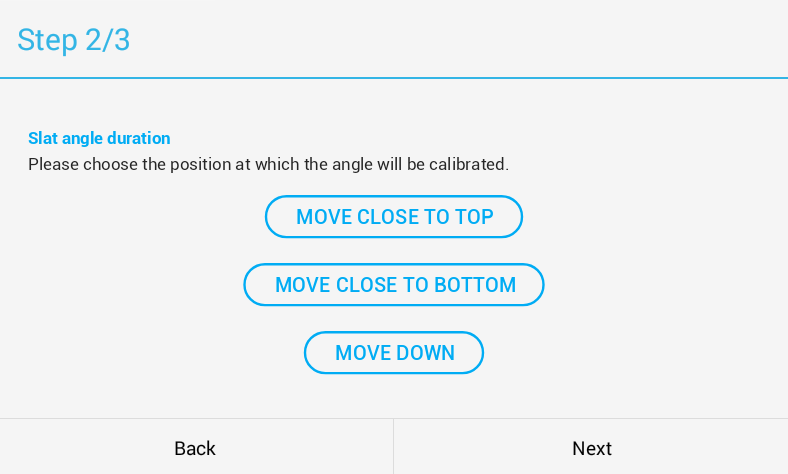
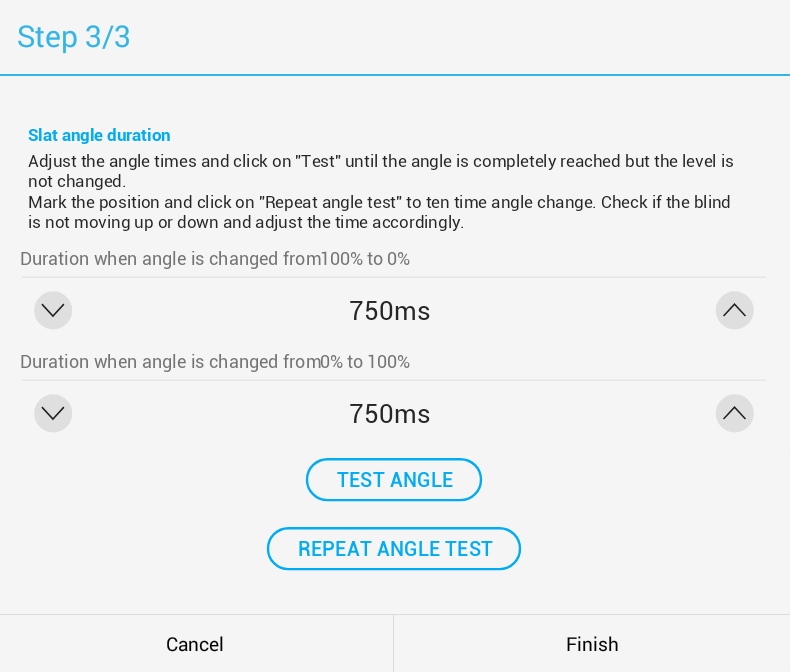
Step 3: Calibrate angle duration time#
Objective: Set blade rotation timing parameters.

- Confirm blinds are in raised position
- Please choose the position at which the angle will be calibrated.
- “Move close to top”: Positions at 20% level time or 5 seconds (whichever is smaller)
- “Move close to bottom”: Positions at 80% level time or 5 seconds from bottom (recommended)
- “Move down”: Manual adjustment with 1-second increments per click
- Click “Test angle” to verify blade adjustment
- Mark position with a sticker
- Run “Repeat angle tests” to check for cumulative errors across multiple adjustments
- Click Finish when blinds maintain position through angle changes

Calibration Verification
After completing calibration, test the blinds in real-world usage. Verify that the position in the application matches the actual position even after multiple movements.
Related Topics#
Video Tutorial#
Note: This guide is part of TapHome documentation. For more information, contact technical support.